

Local biodiversity is not something distant or exclusive to large natural spaces. It can also be found in the neighborhood park, in a nearby field, or even on a vacant lot with spontaneous vegetation.
This classroom project on local biodiversity proposes studying that local biodiversity step by step, combining direct observation, data collection, and simple analysis. It's a practical way to understand how a real ecosystem works, starting with the immediate surroundings.
1. What is local biodiversity?
Local biodiversity is all the life that exists in a nearby and specific place: the neighborhood park, a lagoon, a stretch of river, an olive grove, a nearby forest or even a vacant lot full of weeds next to the house.
It doesn't just talk about large or showy animals. It includes plants, insects, birds, fungi, small mammals, reptiles, and also tiny organisms that we can't see with the naked eye, but that are there and fulfill their function. It's not just a list of species: it's the network of relationships between them and the place where they live.
We often think of biodiversity as something distant, belonging to tropical rainforests or exotic places. However, we only need to look around to find it. A ditch with water, an urban garden, a hedge between two fields, or an area of scrubland can harbor an enormous variety of life if we take the time to observe.
Each nearby environment has its own personality. In a pond, amphibians, aquatic insects, and birds come to drink. In a dry area, hardy plants and small reptiles predominate. Under old trees, fungi, invertebrates, and shelters for birds and bats emerge. One is not richer than another; they are simply different.
Studying local biodiversity involves observing which species are present, when they appear, and how they use the land. A newly landscaped park is not the same as one with wilder areas, nor is an intensively cultivated field the same as one with borders and spontaneous vegetation. The details of the landscape make all the difference.
By observing carefully, we can better understand how a real ecosystem works. Some plants produce seeds and nectar, certain insects pollinate flowers, some birds control invertebrate populations, and other organisms decompose leaves and organic matter to return nutrients to the soil. Everything is connected, even if it's not always obvious at first glance.
Experiencing this nearby diversity changes the way you look at your surroundings. Where before it seemed like "just countryside" or "just a park," you begin to distinguish cycles, refuges, and small stories of daily survival.
That's why learning what lives near us is the first step to protecting it. When you know which species are part of your usual environment, you notice sooner if something disappears, if something new arrives, or if the place improves or deteriorates over time.
Local biodiversity is not something abstract or distant. It is everyday nature, the nature we have just steps from our homes, and understanding it allows us to care for it with purpose and respect.
2. Objective of the local biodiversity project in the classroom
He The project proposes to approach the nearby nature in an orderly manner., almost as if the class became a small field team for a while.
The idea isn't simply to take a walk, but to learn to observe with purpose. It's about discovering what living beings are in a particular place, how they are distributed, and what clues they provide about the quality and balance of that environment.
To achieve this, you'll need to observe carefully, take notes, and share what each group sees. It's not enough to simply say "there are many birds": you'll need to count how many different types appear, which ones are most common, in which areas activity is most concentrated, and which plants seem to attract the most insects and, in turn, the most birds.
This process makes visible something that often goes unnoticed: biodiversity can be recorded and compared. Clear conclusions can be drawn from simple data. For example, a very open space with no vegetation may appear almost devoid of life, while another with shrubs, flowers, and unpruned areas often harbors many more species.
In addition to the naturalistic content, the work introduces research habits. Formulating questions, taking detailed notes, organizing information, and comparing it with that of other classmates are all part of the learning process.
Upon completion, one not only gains a better understanding of that nearby landscape, but also a shift in perspective: an everyday place ceases to be an unimportant backdrop and becomes a site brimming with relationships and signs that only emerge when someone pauses to observe methodically.
3. Class preparation of the local biodiversity project
Before heading outside, it's worth pausing for a moment to decide what you want to observe and how you're going to do it. An outing without a plan usually ends up being just a simple stroll; with a little preparation, it becomes a small investigation.
The first step is to choose a specific and manageable location. It could be a nearby park, a stretch of river, an olive grove, an open field with vegetation, or even a green area in the city center itself. There's no need to go far. The important thing is to be able to explore the space slowly and several times if necessary.
Next, it's helpful to formulate a few guiding questions. Something simple, but that requires careful observation:
- In which part of the place is there the greatest variety of plants?
- Where is there more insect activity?
- Do birds change depending on the type of tree or vegetation?
Keeping these questions in mind prevents you from just looking at things superficially and helps you compare different areas.
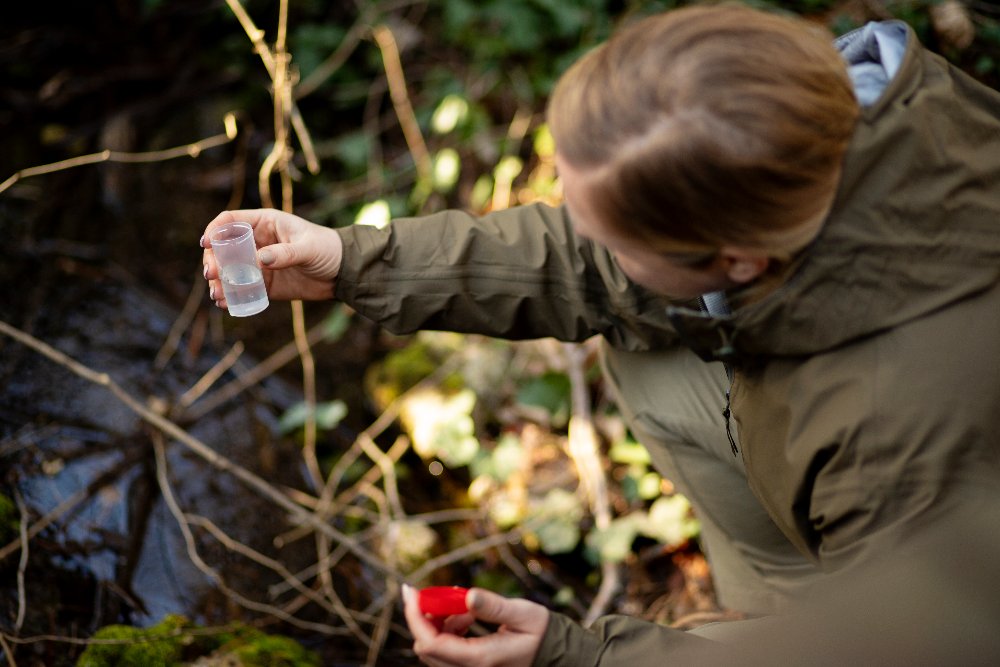
Also It is very practical to have a notebook or observation sheets prepared.. Basic information such as the date, time, exact location of the observation, type of living being, and approximately how many individuals are seen will be recorded there. Adding the type of habitat (on the ground, in a tree, near water, in bushes) provides context to each entry.
If you don't recognize a species right away, don't worry. You can make a small drawing or describe it: size, color, shape of the beak or leaves, any detail that will help you identify it later.
It's helpful to assign tasks within the group before starting. One person can take notes, another can take photos, another can map each observation, and another can count individuals when several appear at once. With this clear division of labor, time in the field is used more efficiently, and the collected data is more organized and reliable.
4. Fieldwork
It's time to go outside and now the key part of the project begins: really looking at what's happening around us.
The key is to move slowly and stop at different points. It's helpful to alternate your gaze: to the ground, to the tree trunks, to the leaves, to the flowers, and also to the sky. Many forms of life are there, but they only reveal themselves when you slow down.
Each plant or animal spotted is noted on the pre-prepared form. If there's time, a photo or a quick sketch is taken. Identifying the exact name can wait; the important thing is to record what was observed so it can be reviewed later.
Besides the living organism itself, it's worth noting the characteristics of the environment where it appears. Is there shade or direct sunlight? Is the ground dry or damp? Are there water nearby, paths, walls, or buildings? These details later explain why certain species concentrate in some areas and not others.
During the wildlife observation in the classroom, It's essential to avoid interfering with the environment. No uprooting plants, lifting stones, or disturbing nests and insects. The goal is to observe how this small ecosystem functions without altering it.
Silence helps more than it seems. When the group lowers the volume and moves smoothly, sounds and movements that previously went unnoticed begin to be noticed: a bird landing, an insect crossing, a lizard coming out to sunbathe.
Each group will return with a notebook full of notes, signs, and quick sketches made on site. From there, it will be possible to calmly review the observations and see how the presence of life varied depending on the location where the data was collected.
For example, in an area with flowers, it's common to see more insects and, shortly after, birds that feed on them. These small changes help us understand how species relate to one another.
5. Species identification
After the outing, it's time to calmly review everything collected in the field and try to figure out exactly what each observed thing was.
With photos, sketches, and descriptions in front of them, the group compares details and looks for matches in flora and fauna guides, plates, or identification apps. It's not about pressing a button and accepting the first result, but about carefully examining shapes, colors, proportions, and small features that confirm or rule out possibilities.
The exact name isn't always found. And that's okay. Sometimes it's enough to know if it's a tree, a shrub, or a small plant; if it's a beetle, a butterfly, or a fly; if it's an insectivorous or granivorous bird. That initial classification already allows you to see patterns in the area being studied.
When there is sufficient certainty, the name is added next to the original entry. If doubts remain, it is left marked as unidentified for later review. Forcing a quick response often leads to errors.
This work forces us to look again at what was only seen for a few seconds in the field. Details such as the edge of a leaf, the markings on wings, the length of legs, or the shape of a beak begin to take on importance.
Naming species helps us understand what is common and what is rare, what appears near water and what prefers dry areas, and what presence may indicate that the environment still retains a lot of life.
6. Data recording and organization
Once the species have been identified or at least classified, it is time to put everything that has been noted down into order.
Each finding is entered into a shared table with some basic data: what species it is (or what group it belongs to), how many individuals were seen, the exact location, and the type of habitat. Seeing it all together makes it easier to identify what is repeated and what is missing.
Marking these points on a simple map of the area is even more helpful. Great precision isn't necessary: simply indicating the areas where observations were made is enough to appreciate how the presence of life changes from one spot to another.
The images and drawings serve as backup. They allow for reviewing doubts, confirming identifications, and later comparing whether the same species appear on future visits or if new ones emerge.
Having the information well organized prevents data mixing and facilitates subsequent work. A clear table allows you to count how many times each species appears, see which areas have the highest concentration of records, and begin to detect patterns.
With this prior order, what were previously loose notes are transformed into a fairly accurate photograph of how life is distributed in the place analyzed.
7. Analysis of the biodiversity found
With all the information now organized, it's time to read it calmly and see what it says about the place.
A first step is to count how many different types of living things have been recorded and which ones appear repeatedly. If there are many different species spread across the area, the variety is high; if almost everything is repeated in just a few names, the environment is more uniform.
Then it's worth looking at each area separately. Sometimes the points near the water have more records, while the drier parts are poorer, something that is frequently observed when working with the fauna and ecosystems near the school. Under dense trees, insects and small birds may be abundant, while in open spaces other species adapted to direct sunlight predominate.
Another key aspect is to look at the coincidences. When certain flowers and certain insects always appear together, or when where there are many insects more insectivorous birds begin to be seen, small chains of relationship can be inferred.
Areas with very few observations raise questions. Factors that could include a lack of vegetation cover, constant foot traffic, noise, or overly intensive maintenance that leaves the ground clean but almost lifeless.
It's not about getting a single answer to everything, but about learning to connect what you've observed with the characteristics of the place. From these comparisons, you begin to see which areas support the most local biodiversity and which could be improved with a little more space and care.
8. Proposals for improving the environment
With what has been observed and analyzed on the table, it is time to think about what could be done to make that place more vibrant.
Major interventions aren't necessary. Often, small, well-chosen changes make all the difference. Leaving a corner unmowed, allowing wildflowers and grasses to grow, or adding native plants can provide food and shelter for many organisms.
If data shows that insect populations increase where flowers are present, it makes sense to create a small area with species that bloom at different times of the year. This keeps resources available for a longer period.
They can also consider simple protection measures: avoid stepping on certain sensitive areas, remove trash, preserve fallen logs and branches that serve as hiding places, or limit the use of chemicals that deplete the soil.
The proposals should be based on what was actually observed. If there was almost no shade, perhaps planting some trees would be a good idea. If no water-dependent wildlife appeared, a shallow pond could change the situation.
At this point, the important thing to understand is that when the habitat improves, biodiversity usually responds. And often, modest adjustments are enough to start noticing changes in a short time.
9. Presentation of results
The work doesn't end with data collection and analysis. It's important to share what you've discovered.
Each group can prepare a clear way to explain their results: a mural with photos and drawings, an oral presentation, a written report, or a map showing the areas richest in local biodiversity.
The presentation should include the main data: how many species were found, which were the most abundant, and in which places the greatest variety of life appeared.
It is also the time to explain the proposed improvements to the environment and why they might work based on what has been observed.
Sharing the results with the rest of the class or the school community makes the project useful to others. It's not just an exercise; it's a way to show the biodiversity of the local environment and how it can be protected.
10. Project evaluation
When finished, it is worth taking a moment to think about how the work has gone.
You can check if the initial questions have been answered and if the data collected has been sufficient to understand the place studied.
It is also useful to assess the working method: whether the field notes were helpful, whether the task organization was clear, or whether anything should be changed in future outings.
Comparing what was expected to be found with what actually appeared allows us to see to what extent the prior ideas coincided with reality.
This evaluation is not about grading nature, but about improving the method. Knowing what worked well and what can be done better helps make the next study more precise and comprehensive.
This type of project not only helps to understand nature, but also to value and care for it from a local perspective.
Antonio Pestana
Antonio Jesús Pestana Salido (Cabra, Córdoba, 1970) is an Andalusian ornithologist and nature photographer, specializing in birds and the interpretation of the Mediterranean landscape. From childhood, he has been involved in the study and observation of wildlife, and has spent decades exploring the natural areas of Andalusia, especially the Subbética region of Córdoba.
He is a nationally awarded nature photographer, winner of the first prize in the Carl Zeiss nature photography competition (4th edition) with a digiscoping image of a common crossbill, in addition to other recognitions in specialized bird photography competitions.
As a field ornithologist, he has participated in bird monitoring and conservation projects, especially for birds of prey and steppe birds, and has served as provincial coordinator in Córdoba for the Montagu's and hen harrier censuses. He is also president of the Abanto naturalist association, dedicated to the dissemination and conservation of natural heritage.
He is the author of several books on Iberian fauna and popular culture published by specialized publishers, including "Iberian birds in popular culture" and "Iberian diurnal birds of prey in popular culture," works that compile proverbs, beliefs and traditions related to birds in popular culture.
In addition to his work as an author and photographer, he develops outreach and environmental education activities, leading nature outings, giving bird photography workshops and collaborating with educational centers, associations and nature tourism projects.
She regularly works with schools, designing wildlife observation activities adapted for primary and secondary school students. She also collaborates with companies and associations on birdwatching tours, teaches nature photography courses, and participates in the design of natural areas.