
1. Introduction: photographing wildlife does not begin when the animal appears
A wildlife photography session doesn't begin when the animal appears in front of the lens, but much earlier. It all starts with deciding which species you want to photograph, choosing the location, studying its habits, checking the light, and preparing your equipment to remain undetected.
In this type of photography, planning is just as important as technique. Unlike other disciplines, we don't control the scene or the moment things happen. Animals follow their own rhythms: they might appear for a few seconds, remain hidden for hours, or simply not be seen that day. Therefore, observing, interpreting the environment, and knowing how to wait are as much a part of the job as handling the camera.
There is also one rule that should never be overlooked: no photograph is worthwhile if it involves altering the behavior of wildlife. Getting too close, chasing an animal, invading a breeding area, or provoking a reaction to get a picture not only creates an unnecessary impact, but almost always ends up ruining the scene we intended to photograph.
Preparing your outing in advance increases the chances of getting good photos, but it also makes the experience much more rewarding. Choosing the observation point, anticipating how the light will change, deciding what equipment to bring, and knowing when it's best to stay still are small details that, together, often make all the difference.
In this guide we will see how to prepare a wildlife photography session step by step, from pre-planning to on-the-ground behavior, to increase the chances of success without interfering with wildlife.
2. Before leaving: decide what species or environment you want to photograph
Before packing your backpack, it's a good idea to have a clear idea of what you want to photograph. A day spent photographing waterfowl in a wetland requires very different planning than an outing to look for birds of prey, mammals at dawn, or small insects in a meadow. Each species uses its environment differently, and this completely determines the planning.
Having a clear objective makes all subsequent decisions easier. If you're looking for waterfowl, it makes sense to focus on lagoons, marshes, or reservoirs. If you prefer to photograph birds of prey, it's worth locating cliffs, their usual perches, open areas, or areas where they typically hunt. In the case of mammals, knowing their activity patterns, the paths they use, or the areas where they feed is often much more important than having a lens with the longest reach.
Taking a little time to understand the species' behavior makes a huge difference. Knowing when it's most active, what routes it usually takes, where it tends to stop, or how its activity changes depending on the time of year allows you to anticipate its movements and increases the chances of getting nature photographs without interfering with its behavior.
There's no need to conduct exhaustive research. Consulting a guidebook, reviewing recent observations, talking to people who know the area, or even visiting the location a few days beforehand without a camera usually provides much more information than arriving on the day of the shoot with no prior knowledge.
It's also wise to adjust your expectations. Wildlife photography doesn't always result in the image you envisioned. Some days the animal doesn't appear, changes its route, or the lighting conditions aren't ideal. Even so, a trip is rarely a waste of time: locating a new perch, discovering a migratory area, or confirming activity patterns can be far more valuable for future sessions than a spontaneous photograph.
The better you know the species and its environment, the easier it will be to anticipate what might happen and prepare an effective and wildlife-friendly shoot. In nature photography, this preparation often makes far more difference than any piece of equipment.
3. Choosing the best location for the wildlife photography session
Your location is just as important to the outcome as the equipment you use. Simply arriving in a natural area and waiting for an animal to appear isn't enough. Choosing the right vantage point allows you to anticipate movements, make better use of the light, and photograph without disturbing the wildlife.
Wetlands, lagoons, reservoirs, and riverbanks often offer good opportunities for photographing waterfowl, herons, waders, and other water-dependent species. In fields, pastures, olive groves, and agricultural areas, it is more common to find birds of prey, hoopoes, bee-eaters, little owls, kestrels, and steppe birds. Mountain ranges, cliffs, and rocky areas, meanwhile, are common habitats for vultures, eagles, and other cliff-dwelling species.
Once you arrive at your location, stop thinking about your camera for a few minutes and focus on observing. A frequently used perch, a small watering hole, a trail marked by animal tracks, or a solitary tree often offer far more opportunities than traveling long distances without a plan. In wildlife photography, moving less and observing more almost always yields better results.
Before you set up, take a few minutes to assess the scene. Check where the light is coming from, what the background will look like, and where the animal is most likely to appear. Sometimes simply moving a few meters away is enough to achieve a cleaner background, more flattering lighting, or a much more appealing composition.
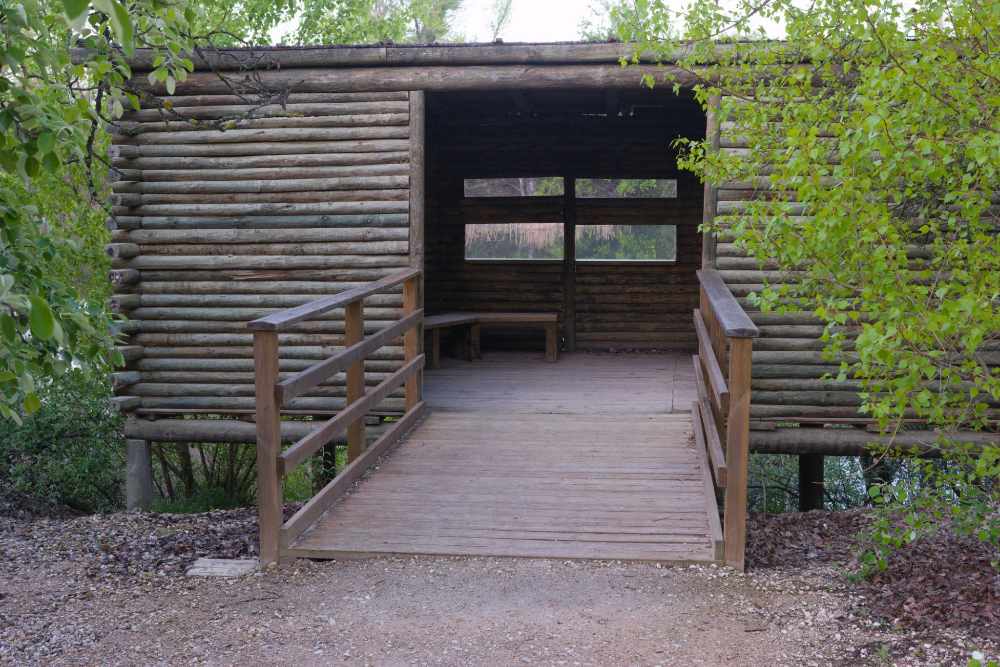
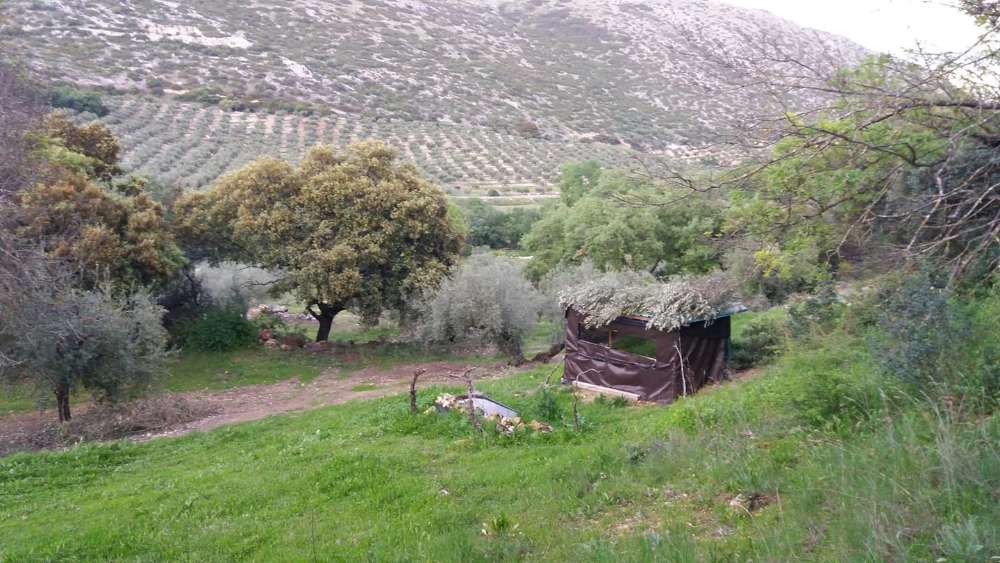
In certain situations, using a photographic hide is one of the best options for working with sensitive species. It allows you to remain hidden for extended periods and photograph natural behaviors while minimizing disturbance. However, its effectiveness depends heavily on planning: the location, orientation relative to the sun, distance from the subject, and how to access the hide are just as important as the hide itself.
Ultimately, choosing the right spot isn't about finding the most spectacular scenery, but about understanding how wildlife uses that space. This ability to interpret the terrain is what, over time, makes the difference between just another outing and a truly productive session.
4. Choose the best time and the best time of year
In wildlife photography, choosing the right time to go out is almost as important as choosing the location. Animal activity changes throughout the day, as do the light and environmental conditions. Planning your schedule allows you to work with many more opportunities to get good photographs.
The early morning hours are usually the most productive. The light is soft, the environment is calm, and many species take advantage of this time to feed or move around. Furthermore, the reduced human presence makes it easier to observe natural behaviors with fewer interruptions.
The late afternoon offers very similar conditions. The light improves, many species become active again, and others move towards roosting or feeding areas. During the warmer months, these times are also much more comfortable than the middle of the day, when the heat significantly reduces the activity of many animals.
The time of year also influences each session. Spring is notable for its breeding activity and the arrival of many migratory birds, although it requires extreme caution to avoid disturbing nests or breeding areas. In summer, water sources concentrate much of the activity. Autumn is an excellent time to photograph migratory movements, while winter brings together numerous species in wetlands, open fields, and wintering areas.
Before heading out, it's worth checking the weather forecast. Wind, rain, fog, or a heatwave can completely alter wildlife behavior. Similarly, overcast skies often provide soft, even light, while strong winds make it difficult to stabilize equipment and disrupt the activity of many species.
Choosing the right time and season doesn't guarantee a great photograph, but it does increase the chances of finding wildlife active and working in better conditions. In nature photography, understanding these patterns is often much more helpful than relying on improvisation.
5. Basic equipment for a wildlife photography session
Having good equipment makes the job easier, but it's far from being the most influential factor in the outcome. In wildlife photography, knowing the species, choosing the right moment, and knowing how to position yourself often makes a much bigger difference than using the most advanced camera on the market.
The combination of a camera and a telephoto lens will be sufficient for most situations. Working with long focal lengths isn't just about getting closer to the subject, but about maintaining a distance that allows you to photograph it without altering its behavior. Often, a photograph taken from further away reflects a much more natural scene than one obtained by getting too close.
Stability also plays a crucial role, especially during long waits, shoots from hides, or in low-light conditions. A tripod, monopod, or other good support helps maintain framing, improves sharpness, and makes working with a telephoto lens for several hours much more comfortable.
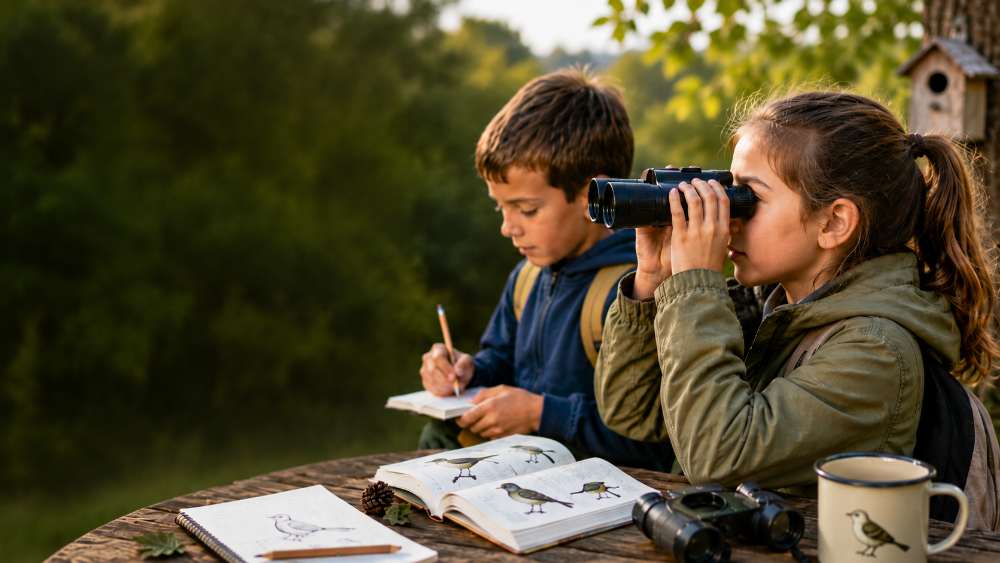
If you have binoculars, it's worth bringing them along. They'll help you spot animals, observe their behavior, and decide where to position yourself before setting up your camera.
Clothing and footwear are part of the equipment, although they often receive less attention. Wearing discreet colors, avoiding noisy fabrics, and choosing footwear appropriate for the terrain allows you to move more comfortably and blend in better. Often, remaining still and letting the animal regain its confidence is more effective than trying to approach a few meters closer.
In addition to photographic equipment, it's a good idea to bring water, some food, spare batteries, memory cards, sunscreen, a flashlight, and something to protect your gear if the weather changes. These are small details that can prevent a good day from ending prematurely.
Finally, carrying a field notebook or taking notes on your phone helps record useful information for future outings: activity times, species observed, changes in light, perches used, or areas traversed. Over time, these notes become a far more valuable tool than many accessories.
The best equipment is not always the most expensive, but the one that allows you to work comfortably, adapt to the terrain conditions and photograph while respecting the natural behavior of the wildlife.
6. Prepare the session without disturbing the wildlife
Every wildlife photography session should start from a very simple idea: no photograph justifies altering an animal's behavior. Getting a good image should never take precedence over its well-being.
The first step is to maintain a safe distance. Each species has a different tolerance level for human presence, and it's important to learn to recognize when we've gotten too close. If it stops feeding, becomes alert, changes direction, or moves away upon detecting our presence, it's a clear sign that we should back off.
Breeding areas require special care. Nests, burrows, roosts, or shelters should not become photo opportunities. A seemingly insignificant disturbance can cause the nest to be abandoned or leave the young exposed to predators or unfavorable environmental conditions.
Patience often yields better results than trying to get a few meters closer. Instead of following the animal, it's usually more effective to choose a good vantage point and wait for the scene to unfold on its own. If the animal decides to leave, the right thing to do is let it.
It's also wise to be cautious when using decoys, bait, or food to attract wildlife. Besides altering their natural behavior, their use is prohibited or regulated in many natural areas. Wildlife photography aims to document real scenes, not create artificial situations.
Respect for the environment is also part of a good photo session. Staying on the trails when necessary, not entering private property without authorization, closing gates in livestock areas, and not leaving any trash are simple actions that help preserve the places we photograph.
When we work calmly and respectfully, we not only protect wildlife, but we also increase the chances of observing authentic behaviors and capturing images that reflect nature as it is, without having interfered with it.
7. How to organize the session on site
Once you arrive at your chosen location, resist the temptation to set up your equipment immediately. Taking a few minutes to observe your surroundings will often help you understand what's happening and make better decisions before you start taking photos.
Look for signs of activity. A frequently used perch, a trail marked by animal tracks, feathers, footprints, droppings, or small movements in the vegetation can indicate where it's worth waiting. Often, these clues are more useful than wandering around the area without a plan.
Before you start taking photos, check how the light is falling, what the background is behind your subject, and how the scene might change over the next few hours. Sometimes, a small change in position is all it takes to get a much cleaner and more balanced image.
Once the animal appears, try to observe its behavior before you start shooting. If you identify its usual routes or where it tends to stop, you can anticipate its movements and get more natural shots, instead of reacting to every action.
If you're working from a hide, an observatory, or any other fixed point, make sure your equipment is ready before the wildlife arrives. Reducing movement, avoiding unnecessary noise, and maintaining patience usually yields better results than trying to react hastily when an opportunity arises.
The composition also deserves a few seconds of attention. A clean background, space in the direction of the animal's gaze or movement, and good lighting management usually contribute much more to the photograph than an overly tight frame.
Finally, accept that not every session goes as planned. There will be days when the species appears too far away, remains hidden, or simply doesn't behave as expected. This is all part of wildlife photography. Each outing helps you get to know the terrain better, understand the behavior of the species, and prepare the next one more effectively.
8. Common mistakes when preparing a wildlife photography session
Many of the most common mistakes in wildlife photography are made even before the first shot is taken. Relying solely on equipment and spending little time preparing for the outing usually results in fewer opportunities and worse results. Knowing the species, choosing the right location, and planning the timing often makes a much bigger difference than any accessory.
One of the most common mistakes is going out to take photographs at the least opportune time. The early morning and late afternoon usually have the highest concentration of wildlife activity and offer much more favorable light. In contrast, the middle of the day, especially during the summer, tends to be less productive for many species.
Impatience also works against you. Constantly changing location, traveling long distances without a clear objective, or trying to get too close to the animals often causes them to disappear before offering a good opportunity.
It's also advisable to familiarize yourself with the regulations of the natural area you plan to visit and to understand the principles of ethical nature photography. Many parks, reserves, and private estates have specific regulations regarding access, the installation or use of hides, and certain photographic practices. Furthermore, the Spanish Association of Nature Photographers (AEFONA) promotes its Code of Ethics, based on respect for wildlife and their habitats, emphasizing that animal welfare must always take precedence over any photograph. Keeping these recommendations in mind helps avoid problems and, above all, ensures responsible photography.
Trying to fill the frame at any cost is a very common mistake. Maintaining a safe distance and letting the animal behave naturally almost always produces more interesting images than forcing a close-up that alters its behavior.
It's also important to avoid frustration when a session doesn't go as planned. There are days when the species doesn't appear, changes its routines, or the conditions simply aren't right. That doesn't mean the outing was a failure. Locating a new perch, identifying a passageway, or gaining a better understanding of wildlife behavior are also part of the learning process.
Before taking the shot, take a few seconds to review the scene. An overly striking background, a branch crossing in front of the subject, or any distracting element can ruin an otherwise well-executed photograph.
Over time, experience comes from learning from each outing and avoiding repeating the same mistakes. Observing carefully, planning better, and adapting to what happens on the ground usually yields better results than relying solely on the team or luck.
9. Wildlife photography from a hide: an option to observe better and disturb less
Wildlife photography from a hide allows you to approach animals discreetly and observe behaviors that would otherwise be difficult to photograph. By remaining hidden and minimizing movement, it's easier for the animals to act naturally and continue with their usual activities.
Its use is particularly interesting at water sources, regular perches, passageways, or places frequented by certain species. It also yields very good results with particularly sensitive birds, birds of prey, or small mammals that maintain greater safety distances from humans.
One of the main advantages of using a hide is that it completely changes the approach to the shoot. Instead of constantly searching the terrain for animals, the photographer remains in a strategic position, waiting for the scene to unfold naturally. This waiting allows them to anticipate the animals' behavior and capture moments that would be difficult to obtain otherwise.
However, a hide only yields good results when it is properly planned. Location, orientation relative to the light, distance from the subject, background, and the method of entering and leaving the hide are all aspects that directly influence both the quality of the photographs and the impact on the wildlife.
It's also important to accept that not all sessions will yield the same results. Some days will be very active, while others will see hardly any animals. This uncertainty is part of nature photography and is, precisely, one of its greatest attractions.
For those new to this discipline, working from a hide is also an excellent exercise in observation. It forces you to slow down, pay attention to small details, and better understand the behavior of the species before you start taking photographs.
When used properly, a hide is much more than just a hiding place. It's a tool that allows you to photograph more peacefully, obtain more natural images, and minimize disturbance to wildlife and its environment.
Do you want to experience photographing wildlife from a hide?
In our photographic hides, you can observe and photograph different species from locations designed to minimize disturbance to wildlife and maximize your chances of capturing natural images. Explore our facilities and find the session that best suits your skill level and the species you wish to photograph.
Discover our photographic hides
Frequently asked questions about wildlife photography
What equipment do I need to get started in wildlife photography?
You don't need the most advanced camera to get started in wildlife photography. A camera with a reliable autofocus system and a telephoto lens is sufficient for most situations. As you gain experience, accessories like a tripod, monopod, or binoculars can help you work more comfortably and make the most of every opportunity.
What is the best time to photograph wildlife?
The early morning and late afternoon hours usually offer the best conditions. In addition to softer light, many species are more active during these times. However, the best time will depend on the species you want to photograph, the time of year, and the specific conditions of the location.
Is it necessary to use a hide to photograph wildlife?
Not always. Many wildlife photographs can be taken without a hide, especially from designated observation points or in areas where animals are more tolerant of human presence. However, a hide allows you to remain hidden for longer periods, reduces disturbance, and photographs natural behaviors with greater confidence, particularly when working with sensitive species.
How can I photograph animals without disturbing them?
The key is to respect their natural behavior. Keep a safe distance, avoid chasing them, don't enter breeding areas, and be alert for any warning signs. If the animal stops feeding, changes direction, becomes alert, or tries to move away because of your presence, back off and let it continue with its activity.
Is it advisable to use decoys or baits to attract wildlife?
In most situations, it is not recommended. These practices can alter the natural behavior of animals and are prohibited or regulated in many natural areas. Before using them, it is necessary to consult the local regulations and assess their potential effects on the species. The well-being of wildlife should always take precedence over photography.
Do you want to experience photographing wildlife from a hide?
Put everything you've learned in this article into practice starting from photographic hides Designed for observing wildlife without disturbing its behavior. Enjoy strategically prepared locations that offer excellent opportunities for capturing natural images of different species.
Discover our photographic hides and choose the session that best suits your level, your objectives and the species you wish to photograph.
Discover our photographic hides
Antonio Pestana
Antonio Jesús Pestana Salido (Cabra, Córdoba, 1970) is an Andalusian ornithologist and nature photographer, specializing in birds and the interpretation of the Mediterranean landscape. From childhood, he has been involved in the study and observation of wildlife, and has spent decades exploring the natural areas of Andalusia, especially the Subbética region of Córdoba.
He is a nationally awarded nature photographer, winner of the first prize in the Carl Zeiss nature photography competition (4th edition) with a digiscoping image of a common crossbill, in addition to other recognitions in specialized bird photography competitions.
As a field ornithologist, he has participated in bird monitoring and conservation projects, especially for birds of prey and steppe birds, and has served as provincial coordinator in Córdoba for the Montagu's and hen harrier censuses. He is also president of the Abanto naturalist association, dedicated to the dissemination and conservation of natural heritage.
He is the author of several books on Iberian fauna and popular culture published by specialized publishers, including "Iberian birds in popular culture" and "Iberian diurnal birds of prey in popular culture," works that compile proverbs, beliefs and traditions related to birds in popular culture.
In addition to his work as an author and photographer, he develops outreach and environmental education activities, leading nature outings, giving bird photography workshops and collaborating with educational centers, associations and nature tourism projects.
She regularly works with schools, designing wildlife observation activities adapted for primary and secondary school students. She also collaborates with companies and associations on birdwatching tours, teaches nature photography courses, and participates in the design of natural areas.